Saturday, August 9, 2014

Installing the Lift Kit

After reading all kinds of things on IH8MUD forums, various vendor websites and overlanding journeys of others, it finally came down to...what do I want to try? Noteably, I read multiple forums suggesting that lift kits greater than 1.75" will create maintenance and wear issues for the vehicle that ordinarily wouldn't occur. I went with a 2.5" heavy duty lift kit from Slee Offroad. Considering the heavier ARB front bumper, Slee back bumper, the planned rooftop tent, single axle off-road trailer and secondary fuel tank, with the help of Christo Slee, I planned for no-road, logging road, creek and small river terrain, outback in the middle of nowhere camping with the family.

I initially ended up with the following parts list by considering the following questions:

  • Will the vehicle be a daily driver? Or overlanding/off-road only?
  • Will the off-road experience be paved, gravel, dirt, logging, mud, no-road, etc?
  • Water? No water?
  • OEM curb weight? Modifications that will add or remove weight?
  • Towing? No towing? If towing, what?
  • Where do you plan to travel? Domestic US? International? If international, what kind of travel?
  • How many people will be transported in the vehicle?

Out of this I chose the 2.5" lift, heavy duty believing that at some point I'll get a different daily driver and save this mighty giant for overlanding/outbacking alone. In all fairness, from my time in Zimbabwe and South Africa, I was already familiar with Old Man Emu suspension systems and knew they had a great reputation for dependability out in the bush. Yes, it influenced my choices. Resultantly, my parts list looked like the following:

  • OME 2864 Old Man Emu rear coil springs - 80 Series LC
  • OME 6000 Old Man Emu Sport Shock - 100 Series Front Comfort Shock
  • OME 6002 Old Man Emu Sport Shock - 100 Series Rear Comfort Shock
  • 303001 Torsion Bar Set - 100 Series LC
  • SOF - Diff Drop Kit for UZJ100, with fit kit
  • SPC Adjustable Upper Control Arms - 100 Series LC

Because I personally have neither the tools, nor the experience, to install springs, and particularly the torsion bars, I decided to go with a local shop who told me they have experience doing multiple lift kits on off-road vehicles. Two days of work and BAM! I now have a bit of a jump to get into the vehicle.

Overall, I'm pleased with the work. Having no experience here, I've driven been driving, testing, listening and learning to understand how a lift kit changes the vehicle's harmony to original OEM design. I hear noises here and there, look for leaks (finding none so far), have noticed a different behaviour when making tight turns and so forth. It handles differently for sure given the center of gravity is higher. I have more learning to do. No argument. And basically don't know what I don't know about lift kits and OEM performance evolution. However, I'm having a great time and look forward to more experimentation and learning.

Two things of note: a) if I have an issue with bottoming out after attaching a loaded off-road trailer, I'll likely change the bump-stops in the rear springs; and b) I was particularly impressed with the solid upper A-arms. They were a seemingly huge and valuable upgrade from the OEM arms. I like the work Slee Off-Road is doing to compose solutions, not just parts.

Sunday, June 22, 2014

Mounting the Front Bumper

After some comparisons between manufacturers, as well as, bumpers within each manufacturer, I settled upon and ordered the ARB Deluxe Bar Winch Bumper from Just Differentials.

Two things stood out as the proverbial pain in the side on this install:

  • ARB's mounting instructions were from 2008 (as dated on the instructions themselves). The instructions try and cover multiple different possible installation routes in the same document (including multiple winch types) and the pictures included in the instructions are inconsistent (pictures in the same installation sequence show different pieces of hardware) making it hard to figure out if you're looking at the same effort/work sequence; and
  • old frozen chassis bolts connecting to welded nut plates inside the chassis itself

Neither were a deal breaker. Both were a pain in the side. More accurately, the old, rusted, chassis bolt journey became a pain in my back for a couple of days. I hereby declare I dislike, with extreme emotion, welded nut plates.

The shipment came in unscathed on a palette. It was interesting to see the ARB front-bumper packing philosophy as compared to the Slee Off-Road rear-bumper. ARB wrapped it in a spongy material and plastic wrap in thick cardboard; Slee, spray foam and thick cardboard. Both were quite different. Both worked even with the bumpers being multiple hundreds of pounds. No box damage. No bumper damage.

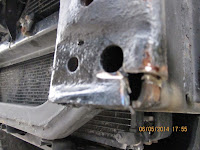
First, we were to grind/hacksaw off the lower wings of the chassis face plates. Choosing an angle grinder, done in no time.

Second, we were to remove the tie-downs and tow hooks on both the left and right sides of the chassis. Should have been easy.

  • Step 1: Remove driver's perspective 15 year-old RH bolts without CenPeCo Penetrator because I'm an idiot
  • Step 2: Break off the nut and nut plate inside the chassis, thereby precluding rear (of two) bolt removal
  • Step 3: Cuss
  • Step 4: Remove front bolt successfully
  • Step 5: Spray CenPeCo Penetrator all the freak over the nuts and bolts on the driver's left side chassis
  • Step 6: Successfully remove both bolts without issue and without bothering the nut plate
  • Step 7: Cuss because of the broken nut plate and my stupidity
  • Step 8: Sit, ponder, discuss, cuss, ponder and consider how to fix the brand new, we just started and ended this project in twenty minutes, problem

Basically, the reason you work with people who have more experience and IQ than yourself is to learn and benefit from their experience. Because the guy I'm working with is particularly mule-headed when it comes to fixing unfixable problems, saving you the commentary of elapsed time, multiple failed solution attempts and more cussing, he removed the bolt holding the body to the chassis (spaced with a ratchet head) and somehow got his fingers and such into a hole that didn't seem possible on the side of the chassis. New bolt and nut installed thereafter. Problem one solved.

According to the instructions, the bumper mounts just slide right onto the chassis and bolt right like magic. The right side of the truck (when sitting in the driver seat) slid on with some wiggling, grunting and verbal persuasion. The driver's LH side didn't fit at all. After some assessment, it seemed the LH faceplate was fatter than the bumper mount could take and it looked fattest on the bottom. So with a grinder I notched out a fat part to prove the theory. Progress, but not enough. After considering additional possibilities, we brought out the persuasion stick, aka a sledgehammer. Lo and behold, the front plate reformed itself and the bumper mount slid on without issue. Negotiation wins again. We installed the newly painted tie-downs and tow hook, tightened up and moved on. Problem two solved.

In retrospect, even though the vehicle was primarily a single owner for all of its life and a second owner (whom I know) for less than a year, we suspect the truck was at some point in a front-end bumper flattening the plates OR the plates themselves weren't formed and fitted correctly at the factory. Either way, it wouldn't fit as illustrated in the directions and required a sledge to remold the plates before the bumper mounts slid on like butter.

Mounting the bumper to the chassis mounts was the easiest part of the effort. An important pro-tip, dry fit the bumper. Put spacers between the bumper wings and quarter panels, set the bolts and tighten. This will ensure equal spacing all along the front, as well as, between both wings and quarters. Tightened. Gapped as desired. Done.

Summary: If you have an older vehicle, spray CenPeCo Penetrator on everything first. Dry mount everything using spacers where necessary. Tighten only after the dry-mount and start the party.

Saturday, May 10, 2014

Installing Safety Equipment

To prepare for any possible event is an interest challenge. Reflecting on what was required of us in Zimbabwe caused me to consider the requirements of other countries and quite simply, what makes sense whether it is a law or not. After doing some research on what other overlanders have installed, our experience in Zimbabwe and South Africa and complimenting it with what seems to make sense to me at the moment, I decided to purposefully address safety needs. I installed or otherwise packed in the truck somewhere the following items:

  • One Badger fire extinguisher rated for trash, wood, paper (A), liquids (B) and electrical equipment (C) in the left rear of the vehicle. It isn't rated for cooking. I'll have to consider that more as we go along.
  • Two Life Hammers used for breaking windows and cutting seat belts. One on the right side of the front console for both people in the front seat, as well as, one in the back for people in the rear of the vehicle.
  • Three seat belt cutters, one in front, two in back.
  • Three weighted base, reflective triangles from AAA in the event of a breakdown stowed in rear cubbies.
  • Also in the rear cubbies are three magnetic strobes from Wagan capable of multiple types of flashing red light patterns including SOS. These things cleverly mount anywhere on the vehicle due to their magnetic personality.
  • One ANSI/ISEA Z308.1-2009 general first aid kit. It isn't huge and definitely doesn't cover all the details necessary for extreme bush first aid/medical needs. However, I'll use it as a baseline implementation.
  • One yellow fluorescent utility vest under the driver seat (in Zimbabwe, these were often kept on the back of seats so the police visibly knew you had them).

Thursday, May 8, 2014

Planned Modifications List

As with anything, ideas abound. I have a list of things I believe to be on my 'to do' list and will continue researching their perceived value until I choose to or not to execute accordingly. Context I have to date is considering overland requirements of terrain I'd like to visit in South America, Central America, different parts of the US, particularly Alaska, as well as, Canada. Presumably off-road, mostly graded off-road though not necessarily, and definitely some paved experiences. I'm not particularly fond of, nor looking to go it with only one machine in the convoy, rock crawling and deep water, higher risk, fjording. Although I really like the word, "fjord". Of course I'm doing more exhaustive research on parts and pieces, routes, gas mileage, way points, weather, terrain and the like. For now, the baseline is outlined below as (what is it, where did I get it/plan to get it, date installed, approximate cost to purchase and approximate time to install for me):

Install Snorkel Fix rust, apply Line-X Replace rear bumper
Replace front bumper Modify suspension Install diff breather kit
Install roof rack Install rooftop tent Install awning
Install tent extension Install mossy netting Install front winch
Install redundant battery system Install air lockers Install two-stage fuel filters
Install flood lights Install rock sliders Install side rails
Install CB Install safety equipment

The date I publish this list is of course the baseline plan. However, as I finish planned work and/or modify the plan I'll continue updating this page associatively. As of this date, I have no idea what I'm talking about, but am excited to learn. I look forward to seeing what actually happens compared to what I think will happen (which is the definition of a journey I believe).

Monday, May 5, 2014

Mounting the Rear Bumper

As with everything else, after a bunch of research I settled upon the Slee Off-Road bumper with optional spare tire and ladder mounts.

The package arrived as a freight truck drop-off, was a large, heavy package (~259lbs) on a palette, and basically in the shape it left the factory. Slee Off-Road took a picture of the delivery prior to leaving the warehouse. I took a picture upon arrival. The pictures matched. I was impressed at how the components were shipped. Had I my wits about me, I would have taken a picture of the actual packing. Everything was individually wrapped and taped. The bumper in first, then expanding blow-foam blown around the perimeter to lock it in place and protect it from external blows. Impressed. Then the internal pieces were set on top and around the bumper using very thick pieces of some sort of padding with adhesive. Once these big padding pieces were in place, I doubt anything moved the entire trip. And then the box itself was closed up and itself wrapped in plastic and strapped shut thereby affixing it to the palette as one big unit. The boys that delivered it moved it up the driveway on a palette jack.

There were five things that needed to be removed from the rear bumper assembly prior to attempting the new bumper mount. After removing these things, the new bumper simply slid into place like a well-worn glove without much effort or coordination.

  • Two sub-assembly brackets on either side of the bumper assembly which originally held the factory bumper. Given they were original, they were also frozen. Since we didn't need to re-use these holes, I cut the head off the final, most stingy bolt and knocked it off with a hammer. All the others eventually came off with some love. This was no place for WD-40, but rather some CenPeCo Penetrator introduced to me by a friend who has decades more experience than I doing this sort of work. When I say things like, "It's frozen and won't move", he only smiles and teaches me another trick of the trade.
  • One tow hook
  • Two recovery point rings

Not knowing how difficult this bumper would be to hold in place, we set two jack stands (with a fat towel for scratch-control) underneath either wing and a floor jack (again, with a fat towel) underneath the rear centerpoint as a matter of safety. Frankly, because of the good design of the bumper itself, after we slid it onto the rear bumper frame assembly, it just sat there making our floor jack and jack stands safety elements only. They really supported no weight. Picking the bumper up and moving it around was a two-man job given the weight and awkward size/design. Otherwise, no issues.

If you have a new vehicle, I suspect the bumper mounting will go free, clear and smooth. If you have an older vehicle like I do, there is some prep-work that I should have done, but didn't think to do. It would have saved time.

  • Find out where you need to put new bolts into the frame and make sure the bolt holes are clean, accessible and will take the bolts easily when needed. I didn't do this. As a result, during the installation we spent extra time cleaning and otherwise getting old holes to work for us. Find which ones you need, clean them in advance. It will save time.
  • There are two bolts on each side of the bumper, closest to the bumper itself (and closest to you when viewing the pictures, bolts 1 and 2), that attach the bumper to the frame. For me, since the old bolts came out of these holes, new ones went in without issue.
  • Farther in from the back of the truck (in alignment with the bolts closest to the bumper, bolts 3 and 4) an additional two bolts need to go on both sides and is likely where an after-market tow bar would mount. These bolts hold the wing-braces to the frame which then connect out to the wing of the bumper itself for leveling, strength and stability. These holes had never been used for the life of the truck. The in-frame bolt plates (or welded nuts, I'm not completely sure) on the inside of the frame were not aligned to the holes and were full of rust, dirt and whatever else gets up in there from greater than decade of weather exposure. We had to hammer the frame, use an air compressor, some more rust remover, holler and complain for an unfortunate amount of time to make it work. We even greased the bolt shafts to aid in the effort. In the end, one of the bolts broke the plate free (or welded nut) and it spun freely. All other bolts went on correctly, though the ones in the unused holes required use of a commercial air gun else it would never have happened. I'll address the bolt that broke free by spot welding that portion of the plate to the frame and there will therefore be no concern. How I address the hanging bolt is yet to be determined.
  • There are two bolts that go straight into the rear bumper frame to the 11 and 1 o'clock positions of the receiver. We had to loosen the bumper to get the holes aligned correctly. Furthermore, to keep the bolts in the socket head as we passed it through the bumper itself to the frame, we greased up the head of the bolt to stick it in the socket head without falling. We had to mess with the bumper a bit to align the holes, pulling a dropped bolt or flat washer out with a magnet a couple of times, but it eventually worked.

Basically, pre-clean all the holes making sure bolts will go where they are supposed to go in advance of mounting the bumper. After that, fit all of the bolts before tightening any of them. It was artful science. I suppose, the older the vehicle, the more art.

Adding the ladder and tire mount were "as-is" simple. Particularly impressive to a friend of mine helping me were the high-end bearings Slee Off-Road uses in both pivots points for ladder and spare time mount. They seem to be high quality which bodes well for aging, weight and extensive use. Just follow the directions and this all makes sense and works as specified.

Out of everything, the license plate light kit seemed to be made of a brittle plastic that, if over-torqued, would likely just snap off. I was careful to not do such and it mounts cleanly. There is ample wiring length and, though I've not yet done it, I expect wiring it in will be a simple as well.

I'm pleased with this $2600 purchase (all in). This is solid, well-engineered, bumper solution with details on it that can only come from people who have first-hand experience.

Addressing Rust

Since I purchased the vehicle in December 2013, I hadn't had the opportunity to really study the vehicle out in the sun without being beaten by the winter winds, snow, etc. Whatever I would find wouldn't bother me because I knew this was the vehicle I wanted to have, build upon, evolve and use for overlanding. In the first nice days of Spring 2014 I took off the front mud flaps and sidesteps. And after giving the truck a thorough review, I found rust in a number of places that simply couldn't be ignored if I wanted to build upon this frame (actually, it could be ignored, but I'd be thinking about it every night whilst laying in bed staring at the ceiling).

  • Across the top of the windscreen where the glass ends and the roof starts
  • Underneath the rear bumper wings (behind rear tires), particularly the driver's side, was pretty much crumbly decay waiting to fall off (you couldn't tell by looking at it with bumper on)
  • On the bottom lip of the truck body, from front tire to back tire, the side steps had been contributing to and hiding rusty, crumbly decay

One of the other things I wanted to address was, in order to mount the snorkel I had to remove the radio antennae which then left a partially exposed hole. As well, in order to mount the snorkel I obviously made many new holes in the body that needed to be cleaned, primed and managed to prevent rust.

So, off to the body shop we went. Things I had done at the shop included:

  • Both bumpers removed
  • Lower metal area behind driver-side rear wheel cut out and completely replaced
  • All rust cleaned down to the metal around the lower perimeter of the truck and above the windscreen (window removed for this effort)
  • All paint removed down to metal where the snorkel mounts to the truck
  • Line-X applied across front of roof where windshield meets roof
  • Line-X applied down both sides of truck, front to back, from bottom lip up to bumper strips mid-body
  • Line-X applied to area just larger than snorkel (radio antennae hole welded up to disappear)
  • Line-X applied up both sides of the windshield largely motivated by the rust, secondarily by the snorkel mount

In order to fix the rust above the windscreen, the body shop guys told me there was a possibility the windscreen could break on extraction. So we included the cost of a new windscreen in the estimate. They were able to extract and fix it without a problem. Much to the chagrin of the body shop team, they cracked the windscreen when putting it back in. A pure accident. They were apologetic. I wasn't upset. Let's get real. Modifying anything other than a new vehicle comes with challenges and you have to know this before you start spending money. We scheduled to have the windscreen replaced in the coming week since I wanted to take the vehicle and get the rear bumper installed over the weekend.

By request, these guys mixed up a batch of touch-up paint for me so I could touch up here and there on things that could potentially be rust incubators. I expect the truck to get scratched up and so forth; no reason to be neglectful on glaring risks and deficiencies to the body along the journey.

After I got it home, I had expected the body shop guys to clean up the front and rear bumper mounts, but realized I failed to communicate it. All on me. So I took a Dewalt drill, a rust removing automotive brush from Wal-Mart and removed all the rust from the front and back bumper mounts, top, bottom, sides and edges (down to the bare metal in some cases). Safety glasses were very important here. Then I applied three coats of quick-dry Rustoleum dark gray body primer to them just to clean it up and help secure it for the next twenty or so years of weather exposure and such. It is just plain more work; however, I know from experience in other things that what you ignore today comes back in spades later. I don't like spades.

All in all, the body shop guys had the truck from Monday morning at 0830h to the following Saturday at 1130h and the cost was about $1540.00 and some change. We estimated that the Line-X added about 35lbs of body weight to the vehicle, though that is an unscientific guess based upon the other Line-X work these guys had performed for other people on different vehicles.